
Installation Installation of Hygienator is very easy.
It is installed in line with flush pipe between flush tank (cistern) and the bowl. Hence it really doesn’t matter which type, make and model; the cistern and the bowl is.
Installation are foreseen in combination of various variants Viz. Open Plumbing or Concealed plumbing V/S western or Indian bowl.
Installation is described in elaborative and step to step manner in a ‘Installation Guide’ supplied with every hygienator. It is in Hindi and English language; with illustration in abundance. Not only a local plumber but any individual enthusiast with proper instruments and knowledge of operating them can do installation. It’s video is available here.
But who ever does, has to be done with perfection.
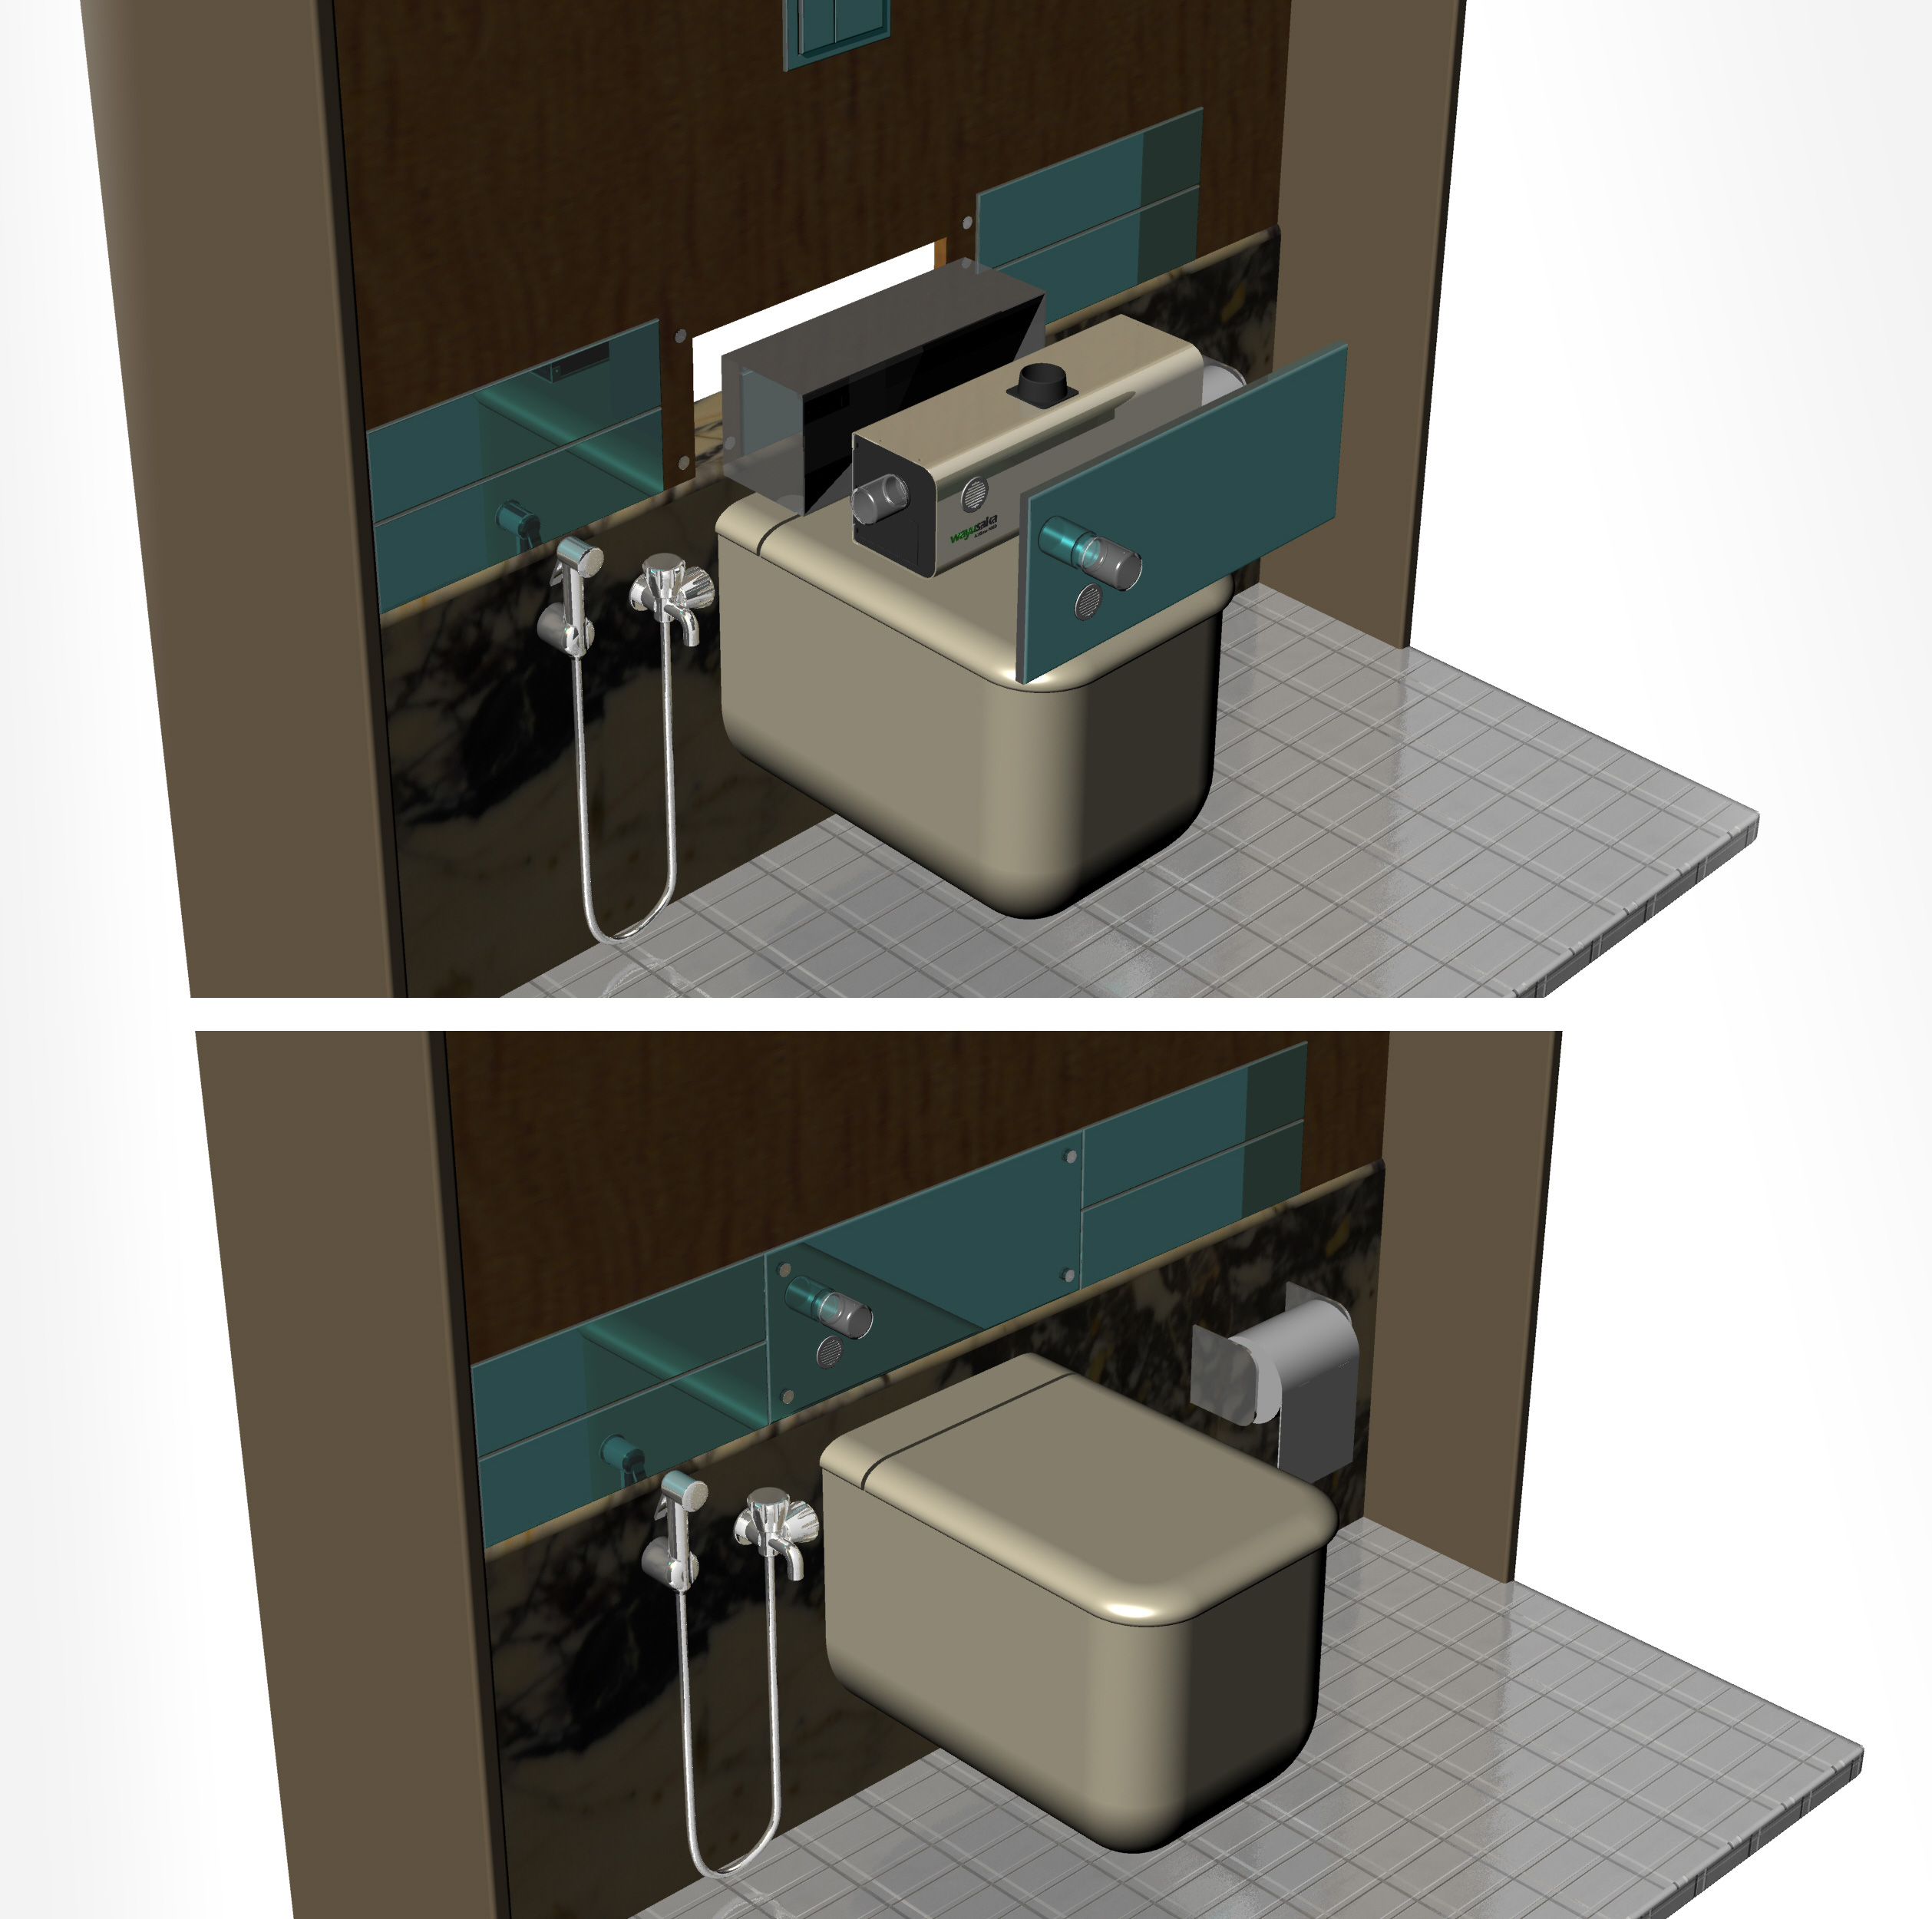
Concealed Plumbing
- Hygienator is fitted below flush tank and before the bowl.
- Standard masonry power tools and plumbing tools and accessories are needed.
- Space of 11 (inch) of flush pipe below concealed cistern (or pressure valve) is sufficient to install the hygienator.
- A rectangular void in wall is required to create. It is recommended to use proper power tools to perform this stage.
- Preparation of the created void from inside to receive PVC housing is well explained in the ‘Installation Guide’. PVC Housing and fasteners are supplied with the Box.
- It is recommended to allow sufficient curing time for cement and civil work performed.
- Hang the hygienator on back wall of ‘PVC Housing’ easily with just 4 screws. Drilling template, plugs and screws are provided with the box.
- With bellows and Hose clamp it is connected to the respective ends of flush path.
- A decorative fascia is fitted in front, hiding a masonry and hygienator behind.
- Exhaust is easy to release with pluggable port into the waste pipe. (Recommended)
- Option to release in open air with extra plumbing with standard pipes is also available.
- Option to release in vent pipe behind toilet cabin, using pluggable port, is also available.